Twickd introduced a new paradigm when it comes to the payment system, allowing creators to have complete control over their customer experience. But with great power comes great responsibilities, hence why this guide exists: to teach you how to set up your account to handle payments and how to properly deal with various customer requests like refunds for example.
Introduction
Handling payments on Twickd is mostly different from what you might be used to if you are already selling packages from another repository. With Twickd, creators receive payments from their customers directly to their payment provider account.
Receiving payments
Before being able to receive payments, you must prepare your PayPal account.
Gathering PayPal API Credentials
Go to PayPal's developer portal and log in with the account that will receive payments. Once logged in, go to My Apps & Credentials. You should see something like this:

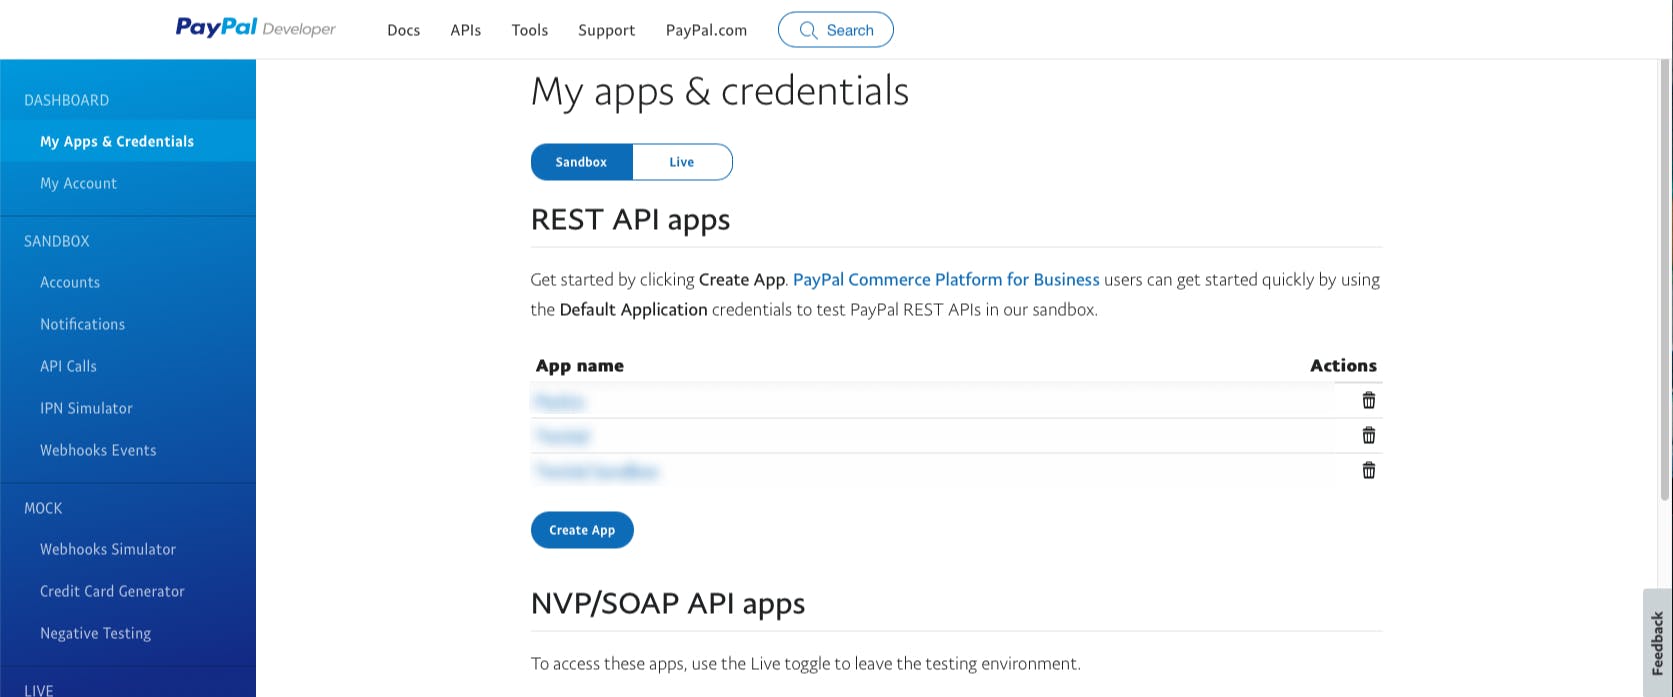
By default, the Sandbox tab should be toggled. If that's the case, click on Live to show the app running in a live environment.
It is crucial to be in a Live environment before going further in this guide, otherwise, you might never receive any payments from your customers.
Then, click Create App. PayPal will then ask you to name your app, we recommend calling it Twickd but you can name it however you like, it's only for organization purposes.
Once your app is created, you should see the details screen.

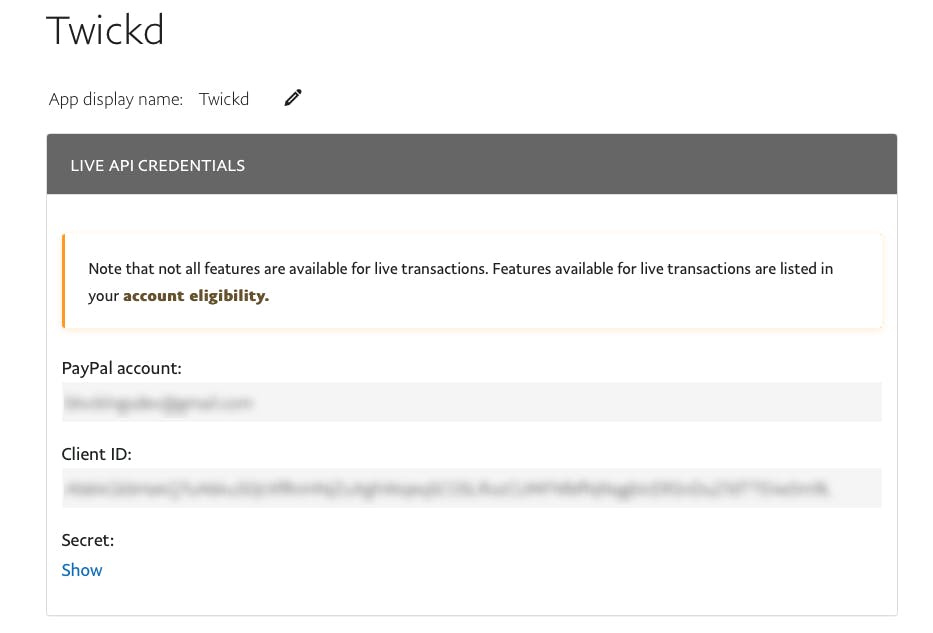
The most important information here is your Client ID and Client Secret. At this stage, copy those into the Payment Provider section of your Twickd Dashboard and save.
Configuring your PayPal App
To make sure that you can fully benefit from the Twickd experience when handling payments, you must configure your PayPal App in a specific way. If we go back to the App details on PayPal and scroll down to the end of the page, you should see the Live App Settings section
In here, make sure that the following boxes are checked:
- Accept payments
- Invoicing
- Customer Disputes
- Transaction Search
You are free to enable the other features if you like.
Here is what your Live App Settings should look like:

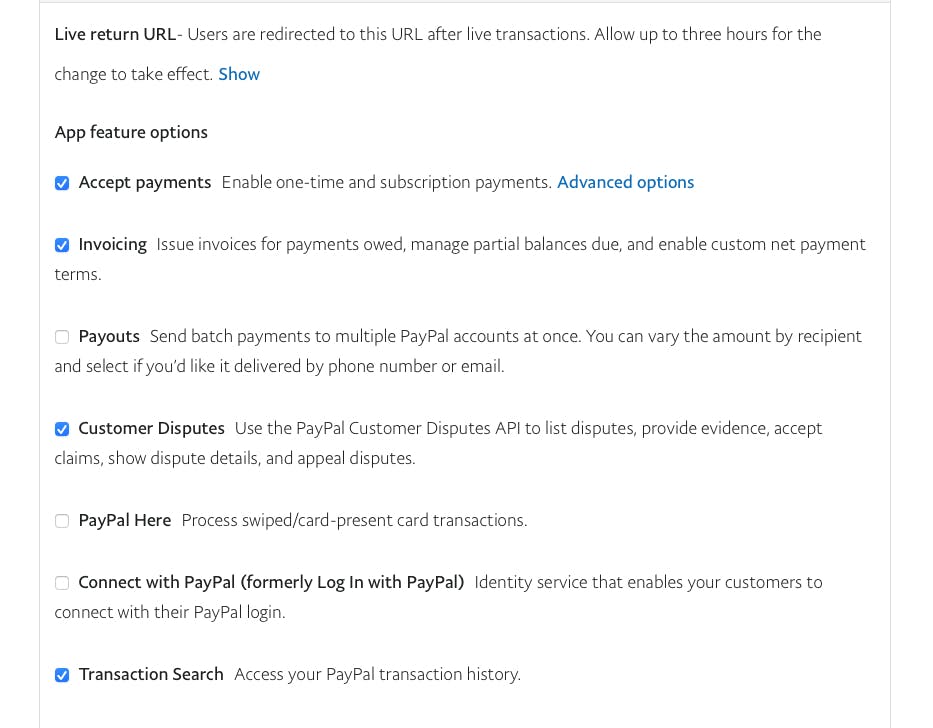
You may now click Save and you should be ready to handle payments.
Bonus step: Micropayments fees
As you know, PayPal, like any other payment processor, takes fees on transactions. For regular transactions (above 10 USD) these fees are insignificant, but for transactions under 10 USD, you can lose a good percentage of your revenue due to these high fixed fees. Here is when micropayments fees come into play, what it does is reducing the fixed fees for all payments under 10 USD.
To enable the micropayments fees on your account, you have to contact PayPal directly and simply ask them to apply the micropayments rate because you will receive payments under 10 USD.
This is not mandatory, but we do strongly recommend that you ask